
Istio ‘Bookinfo’ 데모

이번 포스트에선 Istio 공식 문서로 나와있는 Bookinfo 예제를 따라서 실습 해보고, 그 과정을 정리해보고자 한다. 📚
일단 book info 예제의 전체 구조는 요렇다.

일단 띄우고 보자
kubectl apply -f https://raw.githubusercontent.com/istio/istio/release-1.20/samples/bookinfo/platform/kube/bookinfo.yaml

뭔가가 잔뜩 떴다!
Bookinfo는 일종의 “웹앱“이다. 외부에서 어플리케이션에 접근할 수 있도록 IngressGateway 리소스와 물려보자. 아래의 커맨드를 실행하면, Gateway와 VirtualService 리소스가 생성된다.
kubectl apply -f https://raw.githubusercontent.com/istio/istio/release-1.20/samples/bookinfo/networking/bookinfo-gateway.yaml
Gateway 리소스는 istio의 default IngressGateway인 isito-ingressgateway와 물려있다.
해당 default IngressGateway는 LoadBalancer 타입의 K8s Service로 노출된다.

해당 K8s Service의 EXTERNAL-IP인 192.168.64.2에 접속 해보자!
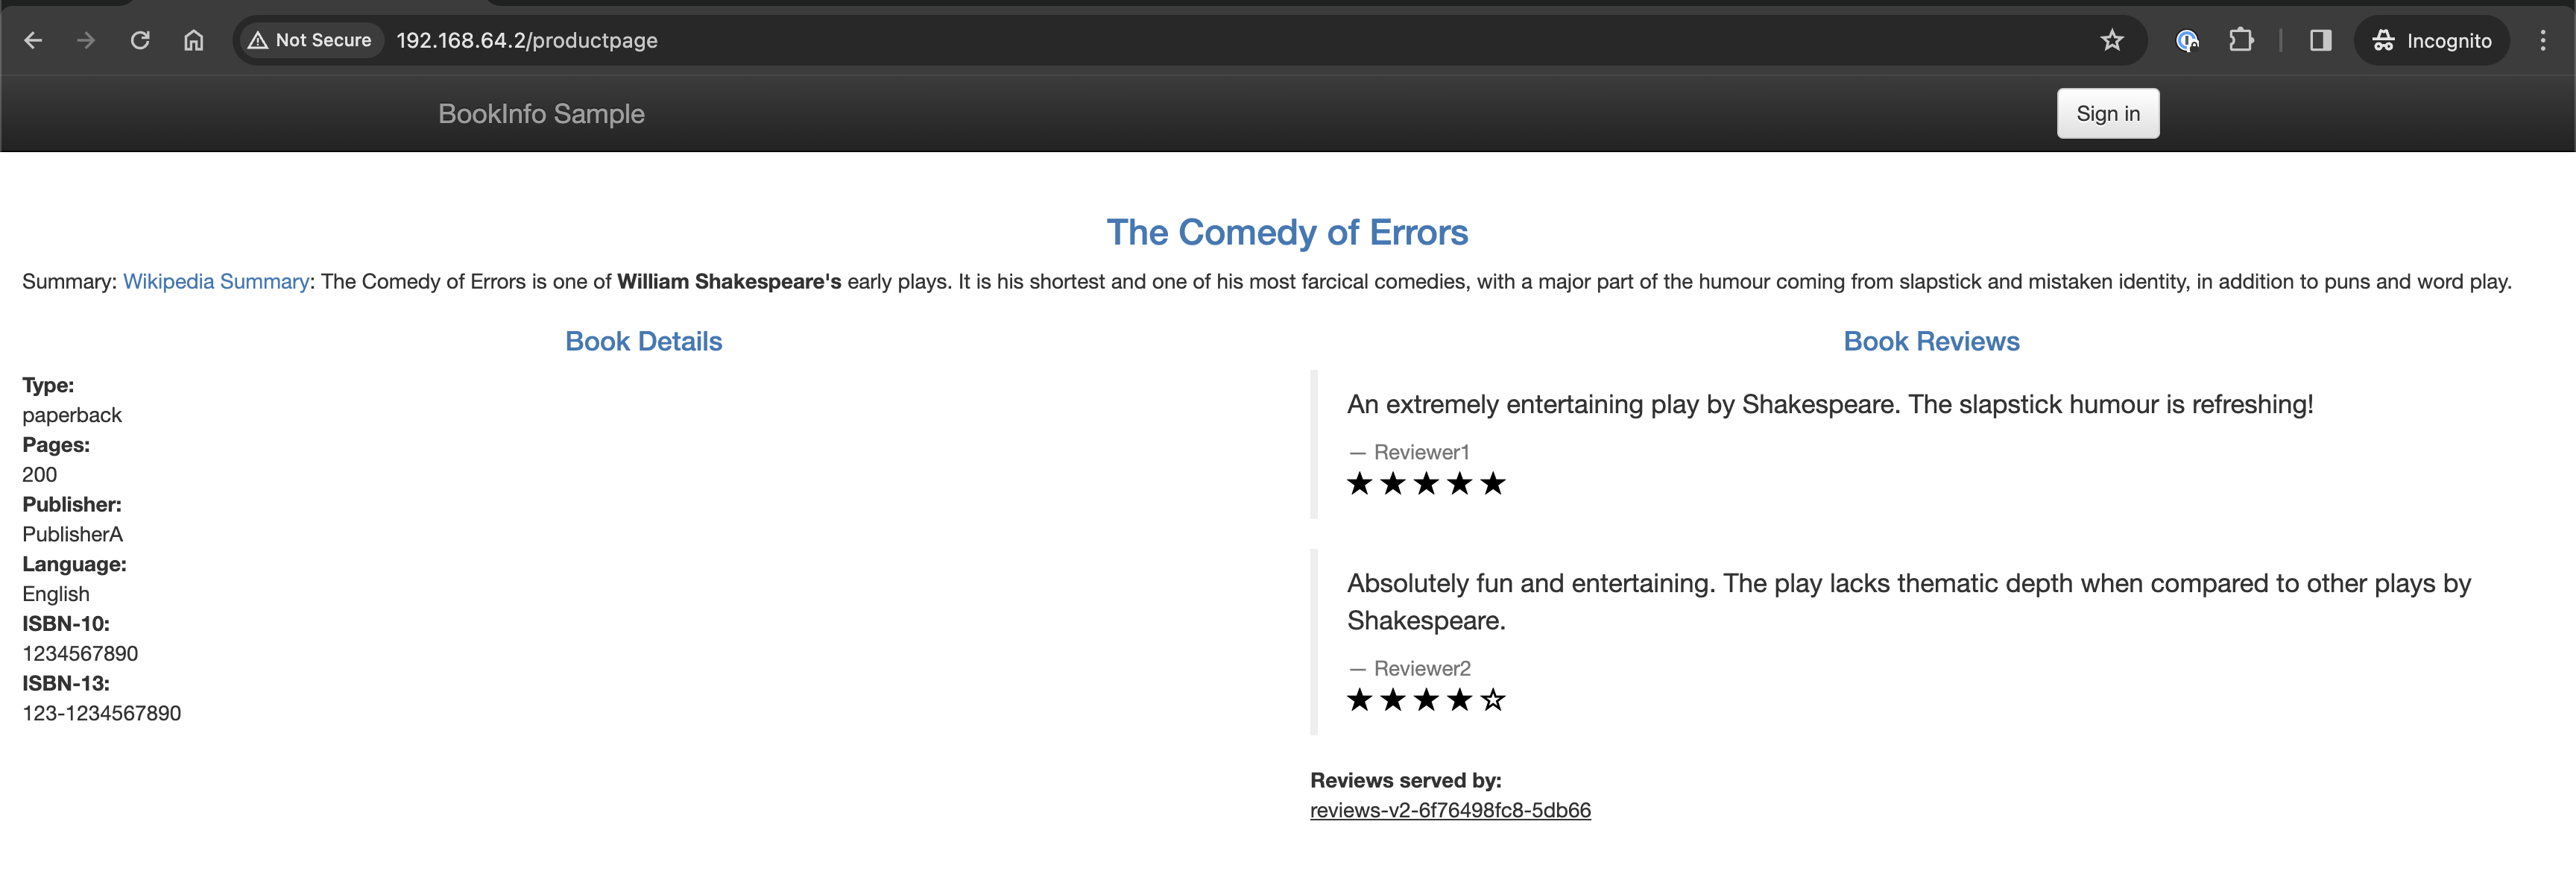
와!! 웹앱에 접속했다!!
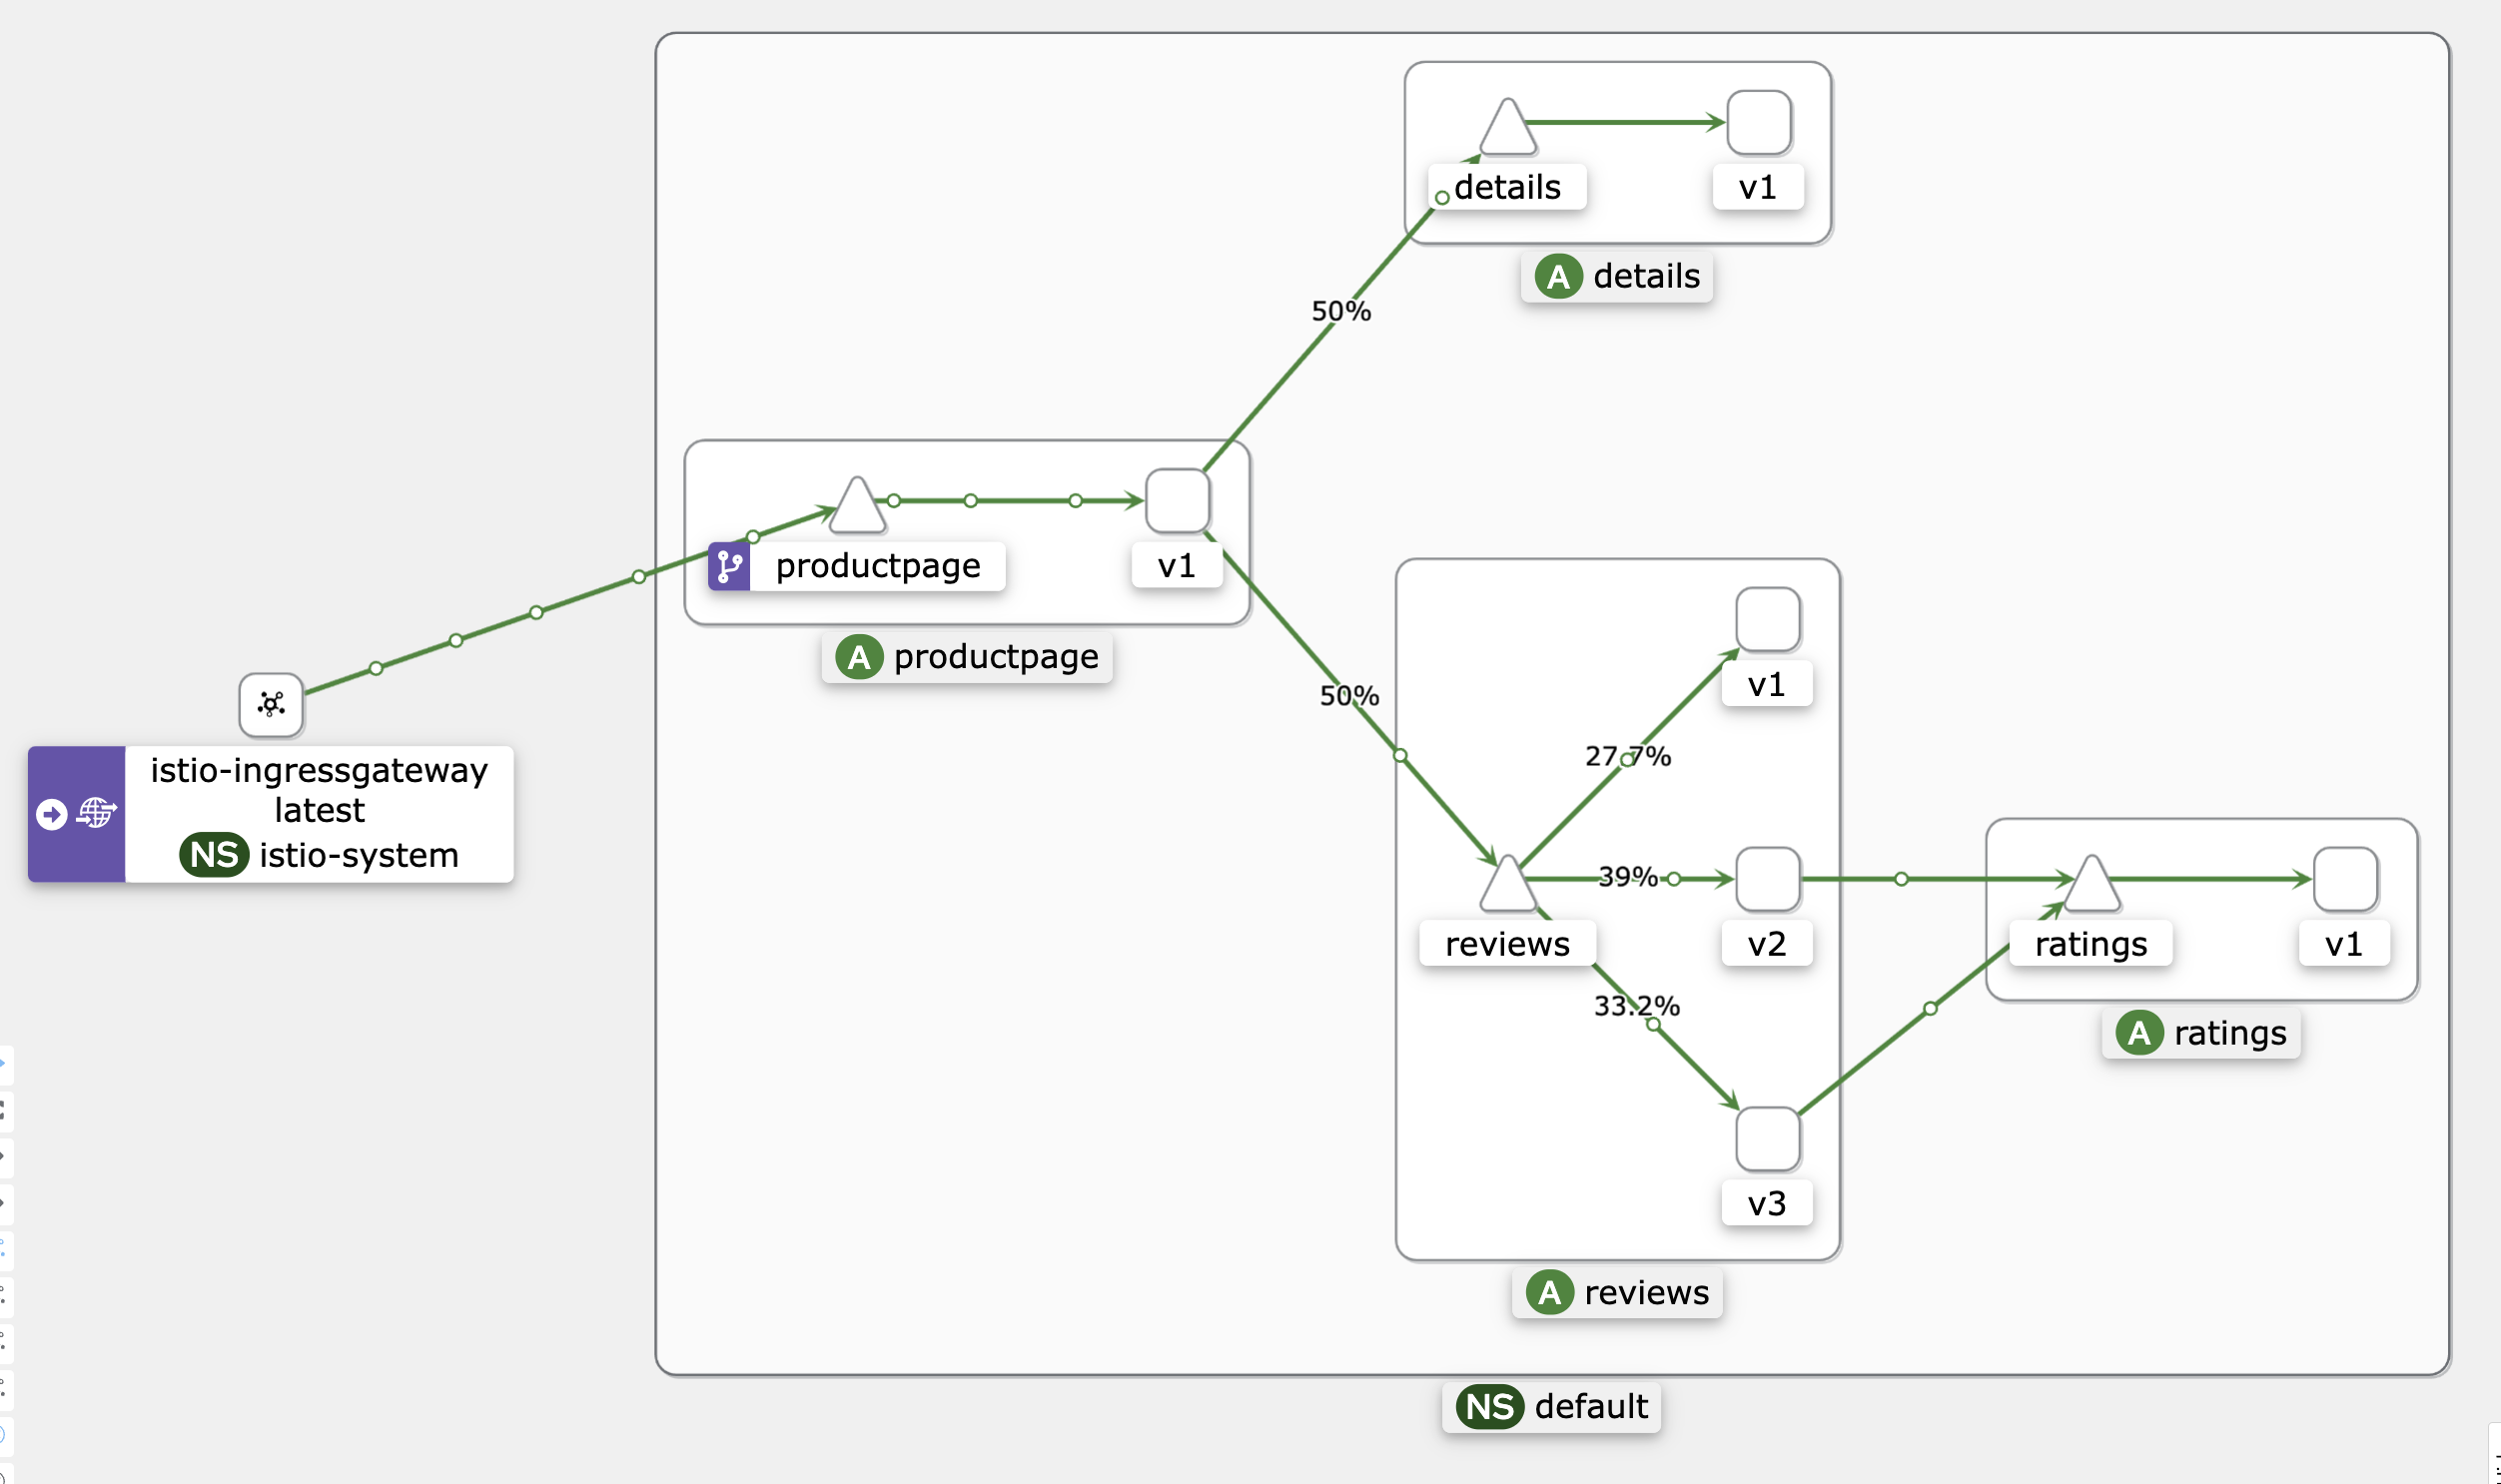 kiali로 확인하면, 전체 구조가 한눈에 들어온다!
전체 어플리케이션의 구조를 다시 보면, 리뷰 항목을 보여주는 부분이 3개의 버전으로 나눠져 있다. 그래서 페이지를 새로고침(refresh) 할 때마다 아래 3가지 뷰가 번갈아가며 보인다.
- 별점이 없는 뷰
- 별점이 있으나 검은색으로 표시되는 뷰
- 별점이 있으나 붉은색으로 표시되는 뷰
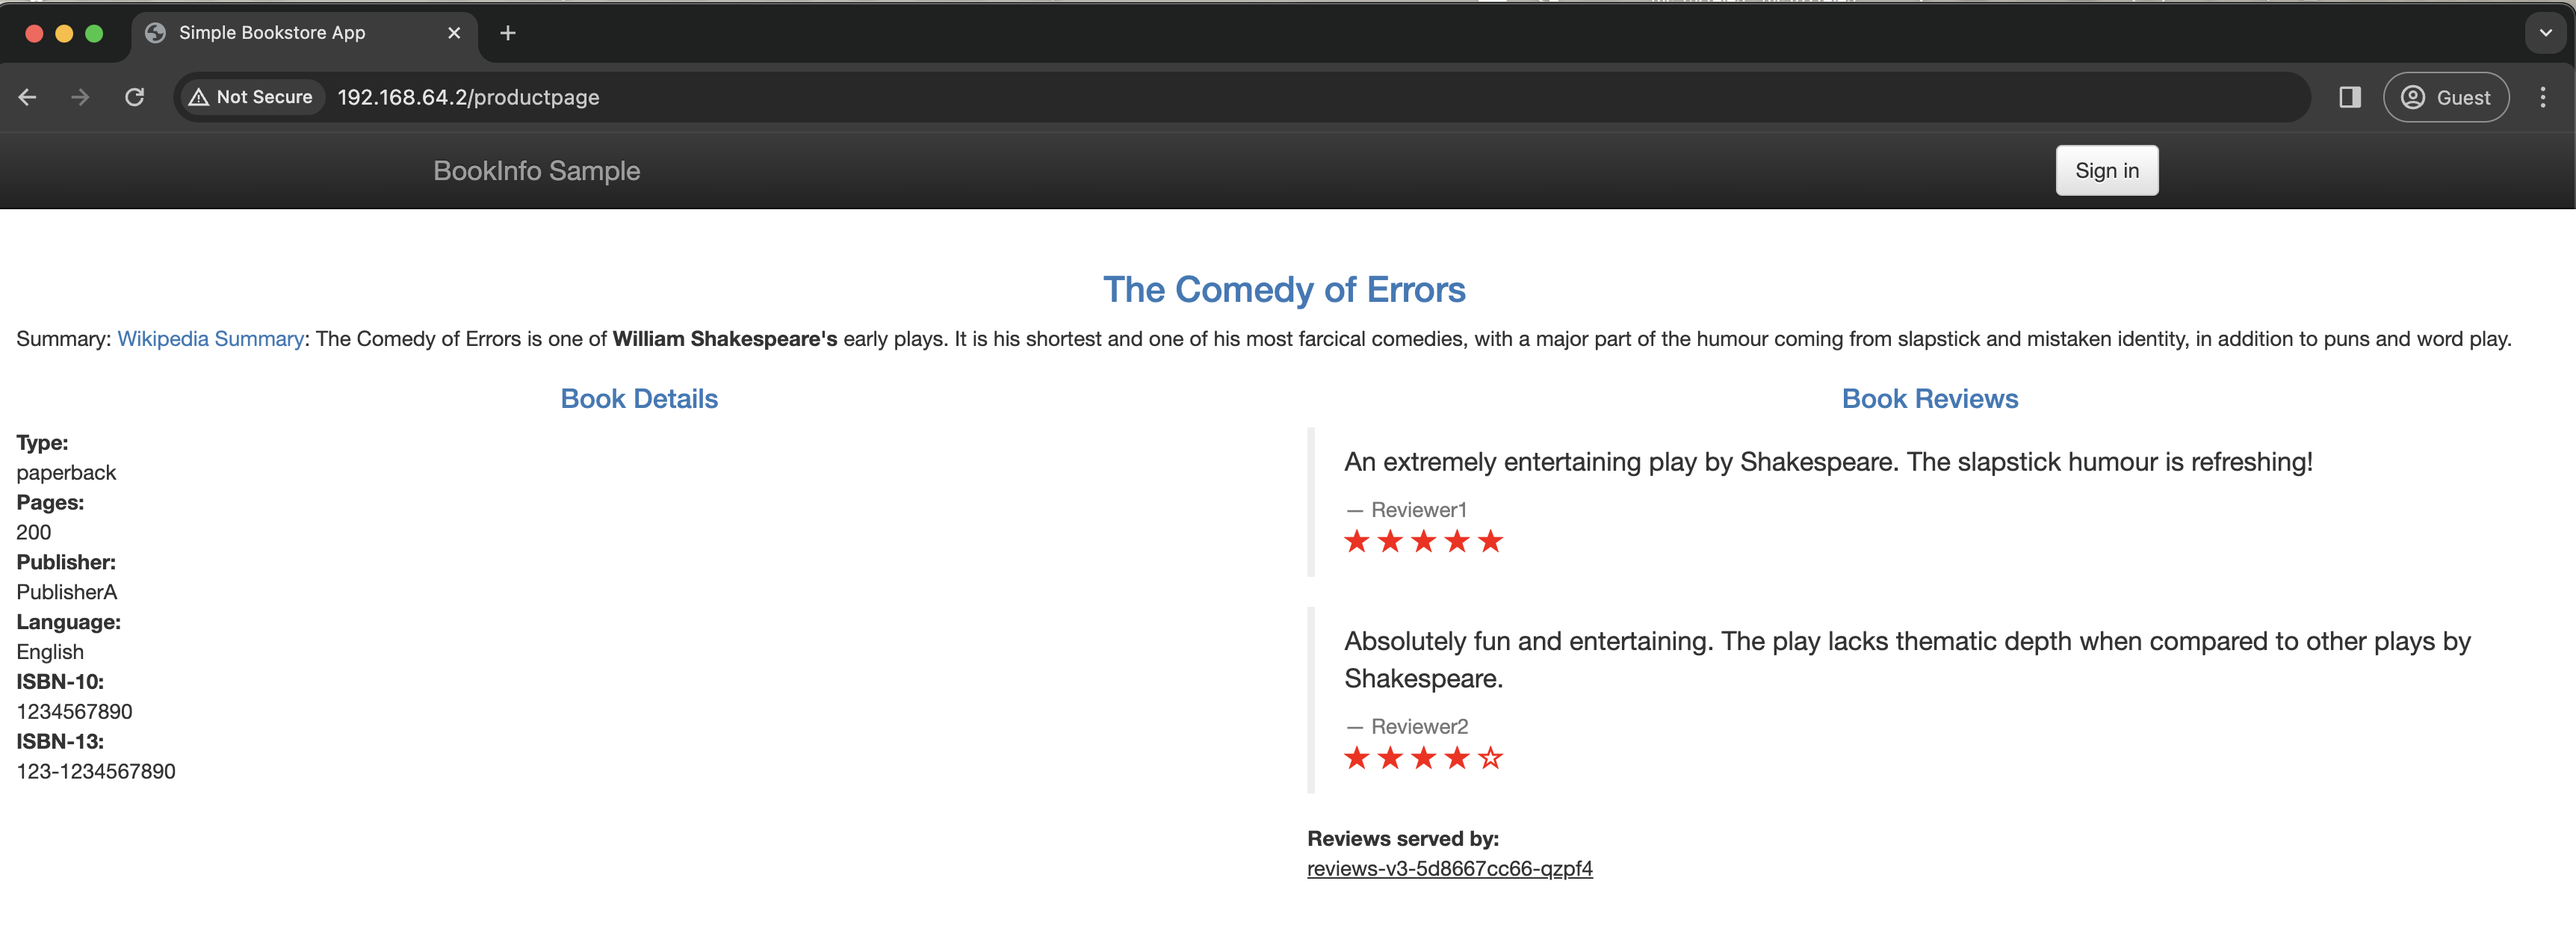 이번에는 별점이 붉은색으로 보인다!
버전별 트래픽 제어하기
이번에는 istio의 DestinationRule과 VirtualService를 사용해서 앱 버전별로 트래픽을 분산하고 제어해보려고 한다.
우선 DestinationRule 리소스를 먼저 생성하자. 내용은 별거 없고 그냥 앱 버전별 subset만 분리되어 있다.
kubectl apply -f https://raw.githubusercontent.com/istio/istio/release-1.20/samples/bookinfo/networking/destination-rule-all.yaml

각 Service 엔드포인트 별 DestinationRule 리소스가 잘 생성 되었다!!
이제부터는 istio의 Traffic Management / Request Routing 문서를 보며, 버전별 트래픽을 제어 해보자.
전부 v1에 라우팅
아래 커맨드로 전부 v1으로 보내는 VirtualService를 생성한다.
$ kubectl apply -f https://raw.githubusercontent.com/istio/istio/release-1.20/samples/bookinfo/networking/virtual-service-all-v1.yaml

이렇게 하고, 다시 웹앱에 접속해보면, 리뷰만 보일 뿐 더이상 별점 정보는 보이지 않는다.
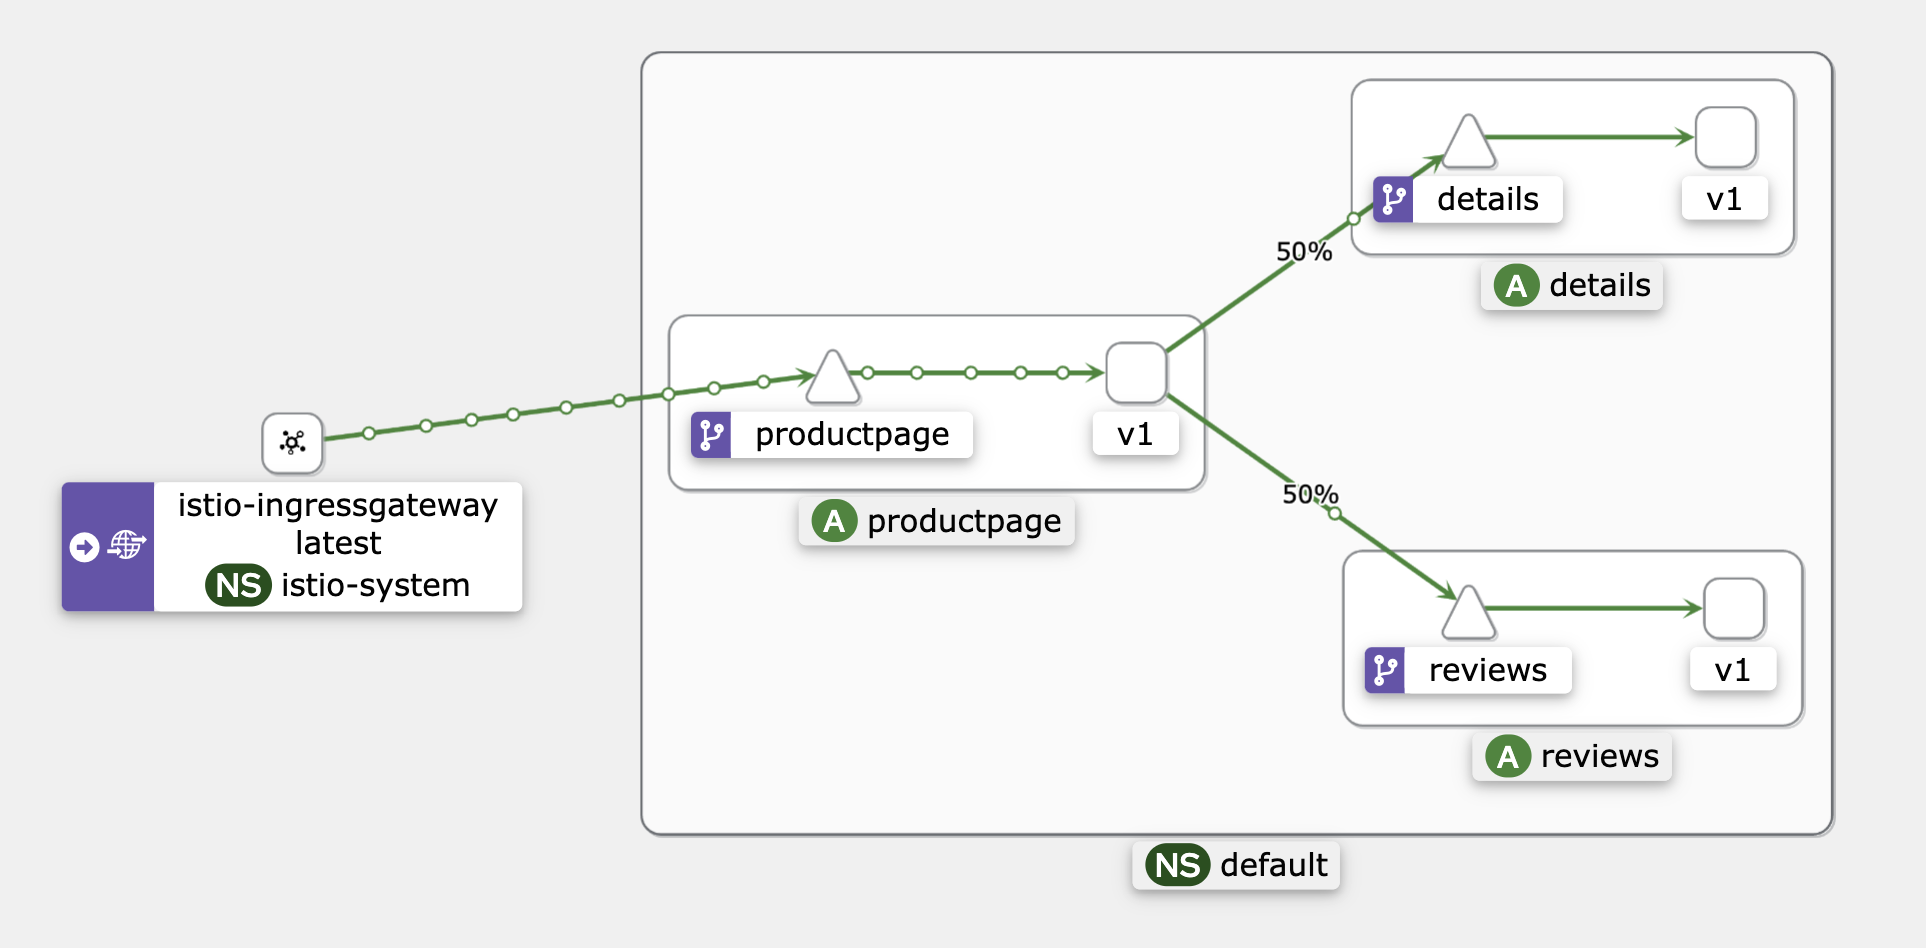
Kiali로 확인해봐도, Reviews 워크로드에서 v1으로만 트래픽이 흐르고 있다!
로그인 정보 있는 유저에겐 v2로 라우팅
놀랍게도!! bookinfo 예제에는 로그인 기능도 구현되어 있다!! (,,⟡o⟡,,)
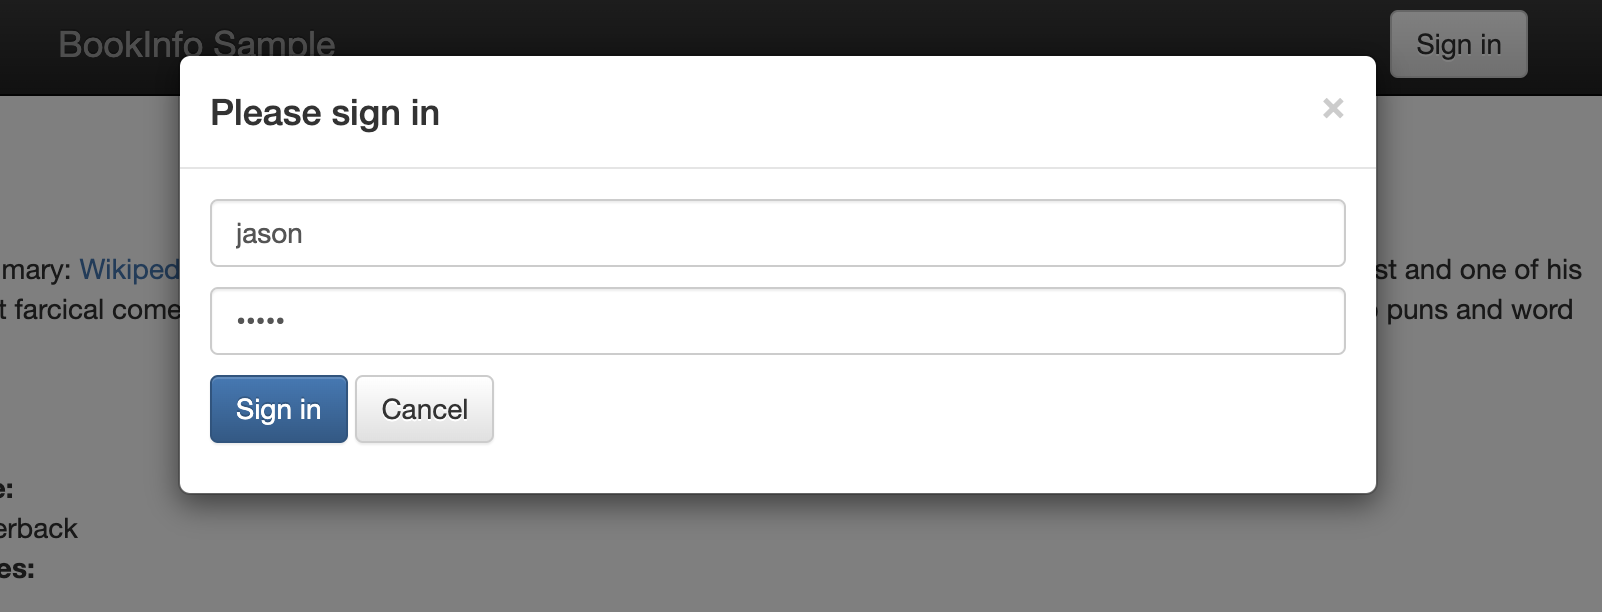
우측 상단의 Sign in 버튼으로 로그인 창을 띄워서 ID/PW 둘다 jason으로 접속하면 로그인이 된다!!
우린 로그인한 유저에게는 Review에 별점(rating)이 함께 보이도록 하고 싶다. 그러기 위해서 아래와 같이 Request Header 기반으로 routing 하는 VirtualService 리소스를 추가해보자!
apiVersion: networking.istio.io/v1beta1
kind: VirtualService
...
spec:
  hosts:
  - reviews
  http:
  - match:
    - headers:
        end-user:
          exact: jason
    route:
    - destination:
        host: reviews
        subset: v2
  - route:
    - destination:
        host: reviews
        subset: v1
$ kubectl apply -f https://raw.githubusercontent.com/istio/istio/release-1.20/samples/bookinfo/networking/virtual-service-reviews-test-v2.yaml
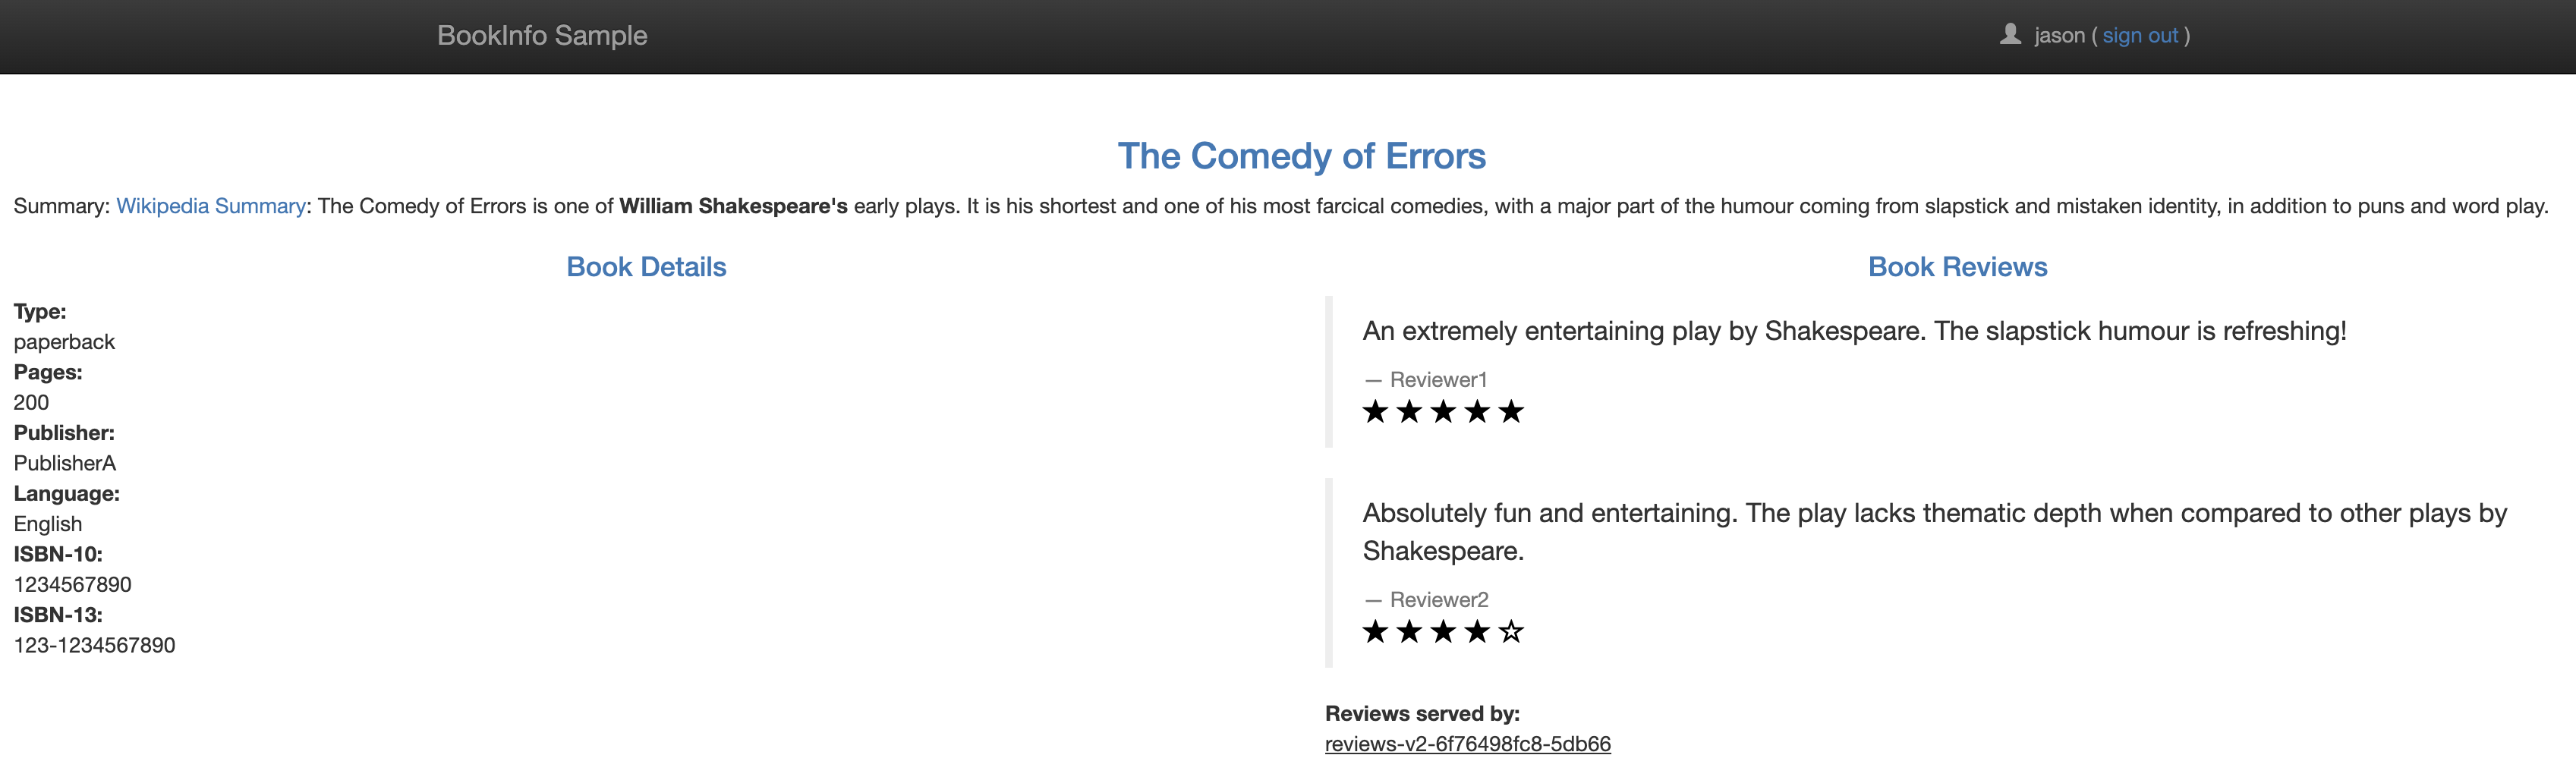
와우! 유저 jason은 이제 리뷰의 별점 정보도 확인할 수 있게 되었다!!
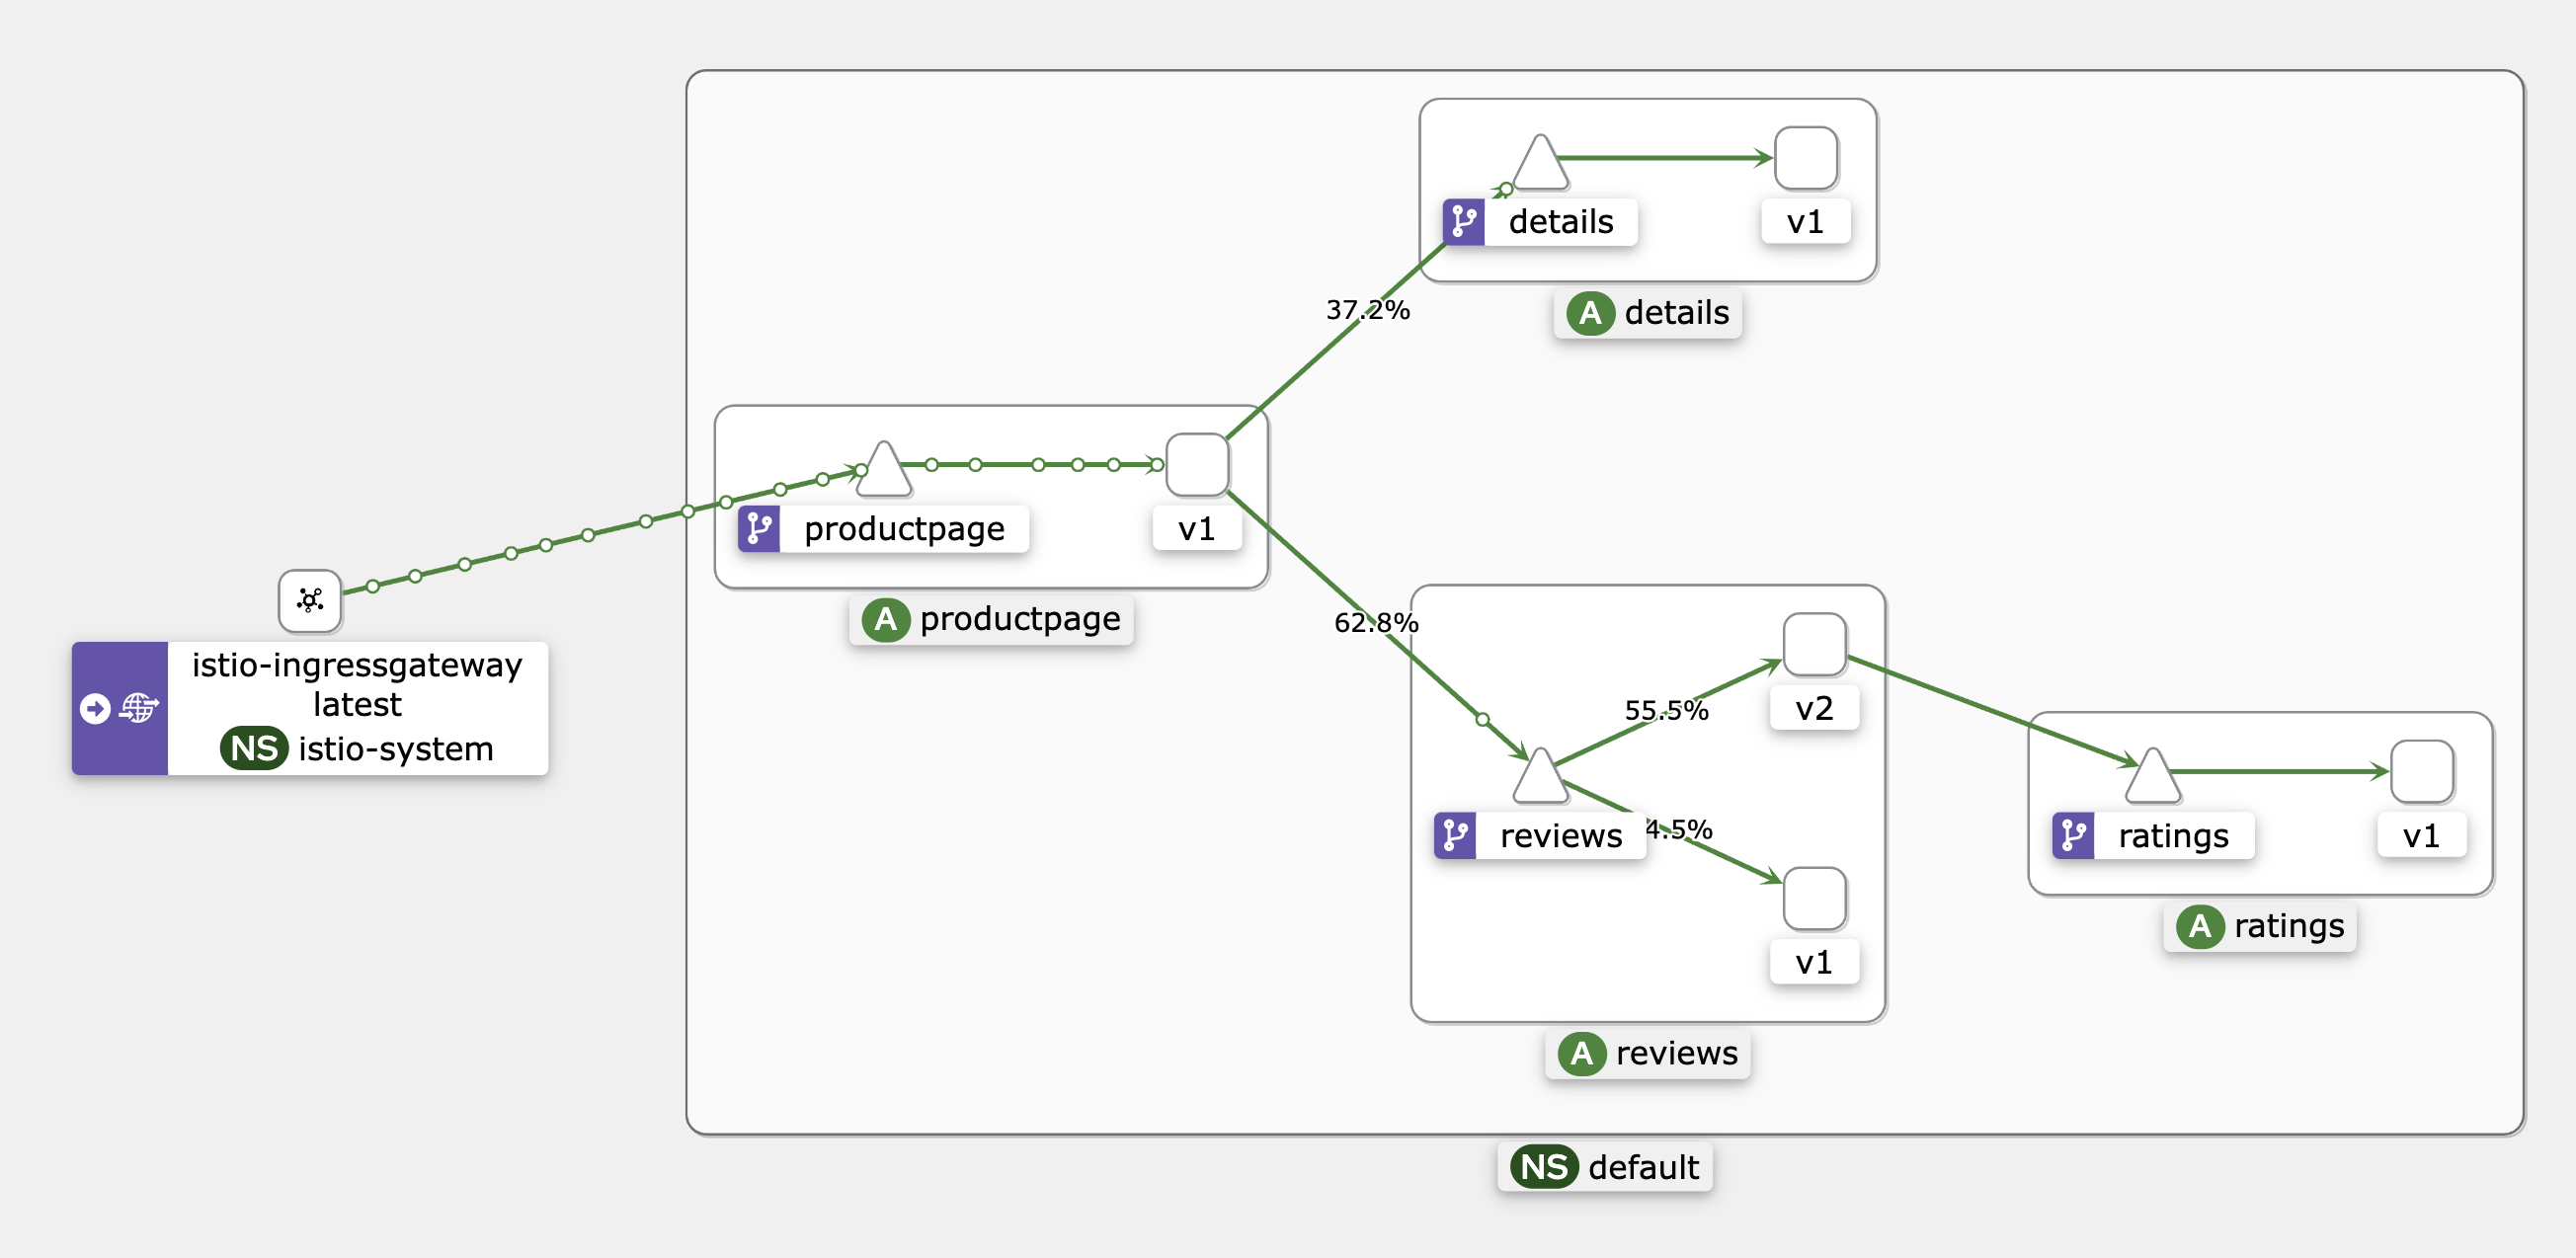
Kiali로 확인해보면, 이젠 v2로도 트래픽이 가고 있다!
맺음말

야호~~~ 이것으로 Istio에서 제공하는 가장 기본적인 예제인 bookinfo 예제를 맛보기 했다 (っ˘ڡ˘ς)
처음에는 예제도 어려워 보였는데, 막상 하라는 대로 해보니 별로 안 어려웠던 것 같다 ㅋㅋ 특히 Kiali로 네트워크 Topology를 바로 확인할 수 있어서 구조를 이해하는데 너무너무너무 편했다!!
이젠 Istio 자격증 시험 준비하면서 조금 깊게 공부한 내용들을 블로그에 정리해보려고 한다 ㅎㅎ
(부록) 한번에 bookinfo 띄우고/내리기
bookinfo 예제는 시각적이기도 하고, 간단하게 MSA 구조를 띄워볼 수 있는 예제라서 istio 문서에서 istio의 기능을 소개할 때 요 bookinfo 예제를 바탕으로 설명하는 것들이 꽤 있다.
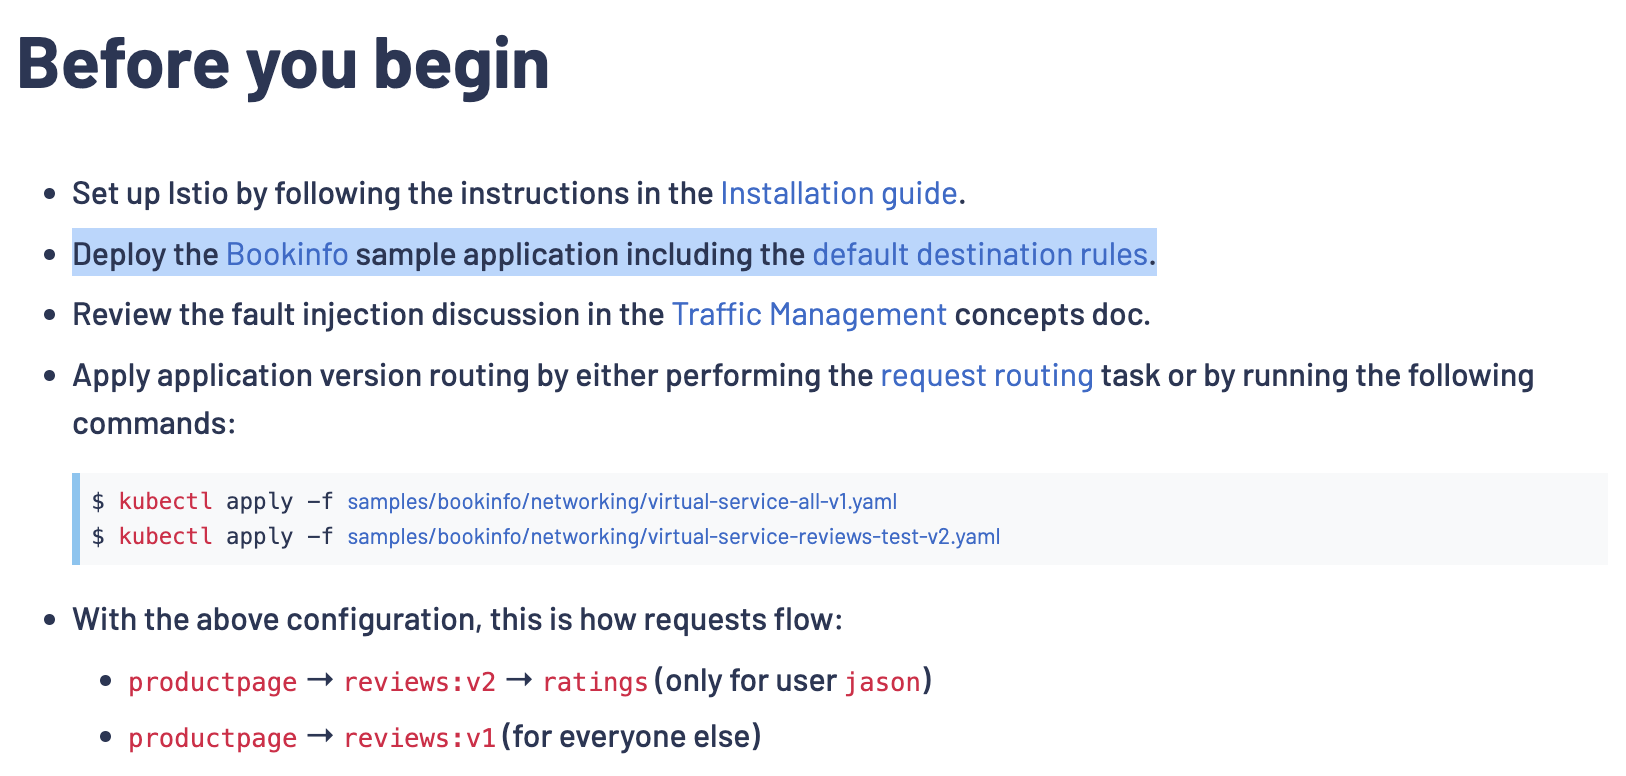 예를 들면, 이렇게 나온다 (istio의 Fault Injection 문서의 한 부분)
그래서 bookinfo 어플리케이션을 띄워두고 이런 기능들을 실험하고 익히는 경우가 많은데, 한번에 bookinfo 어플리케이션을 띄우고, 또 내리는 커맨드를 정리해봤다.
# 띄울 때
# istiod, istio-ingressgateway, kiali는 이미 떴다고 가정
$ kubectl apply -f https://raw.githubusercontent.com/istio/istio/release-1.20/samples/bookinfo/platform/kube/bookinfo.yaml
$ kubectl apply -f https://raw.githubusercontent.com/istio/istio/release-1.20/samples/bookinfo/networking/destination-rule-all.yaml

# 내릴 때
$ kubectl delete -f https://raw.githubusercontent.com/istio/istio/release-1.20/samples/bookinfo/networking/destination-rule-all.yaml
$ kubectl delete -f https://raw.githubusercontent.com/istio/istio/release-1.20/samples/bookinfo/platform/kube/bookinfo.yaml