
Istio: Egress Gateway

어림없지! Istio를 쓰면 서비스 메쉬를 나가는 트래픽도 모니터링 한다!!
Egress Gateway란?
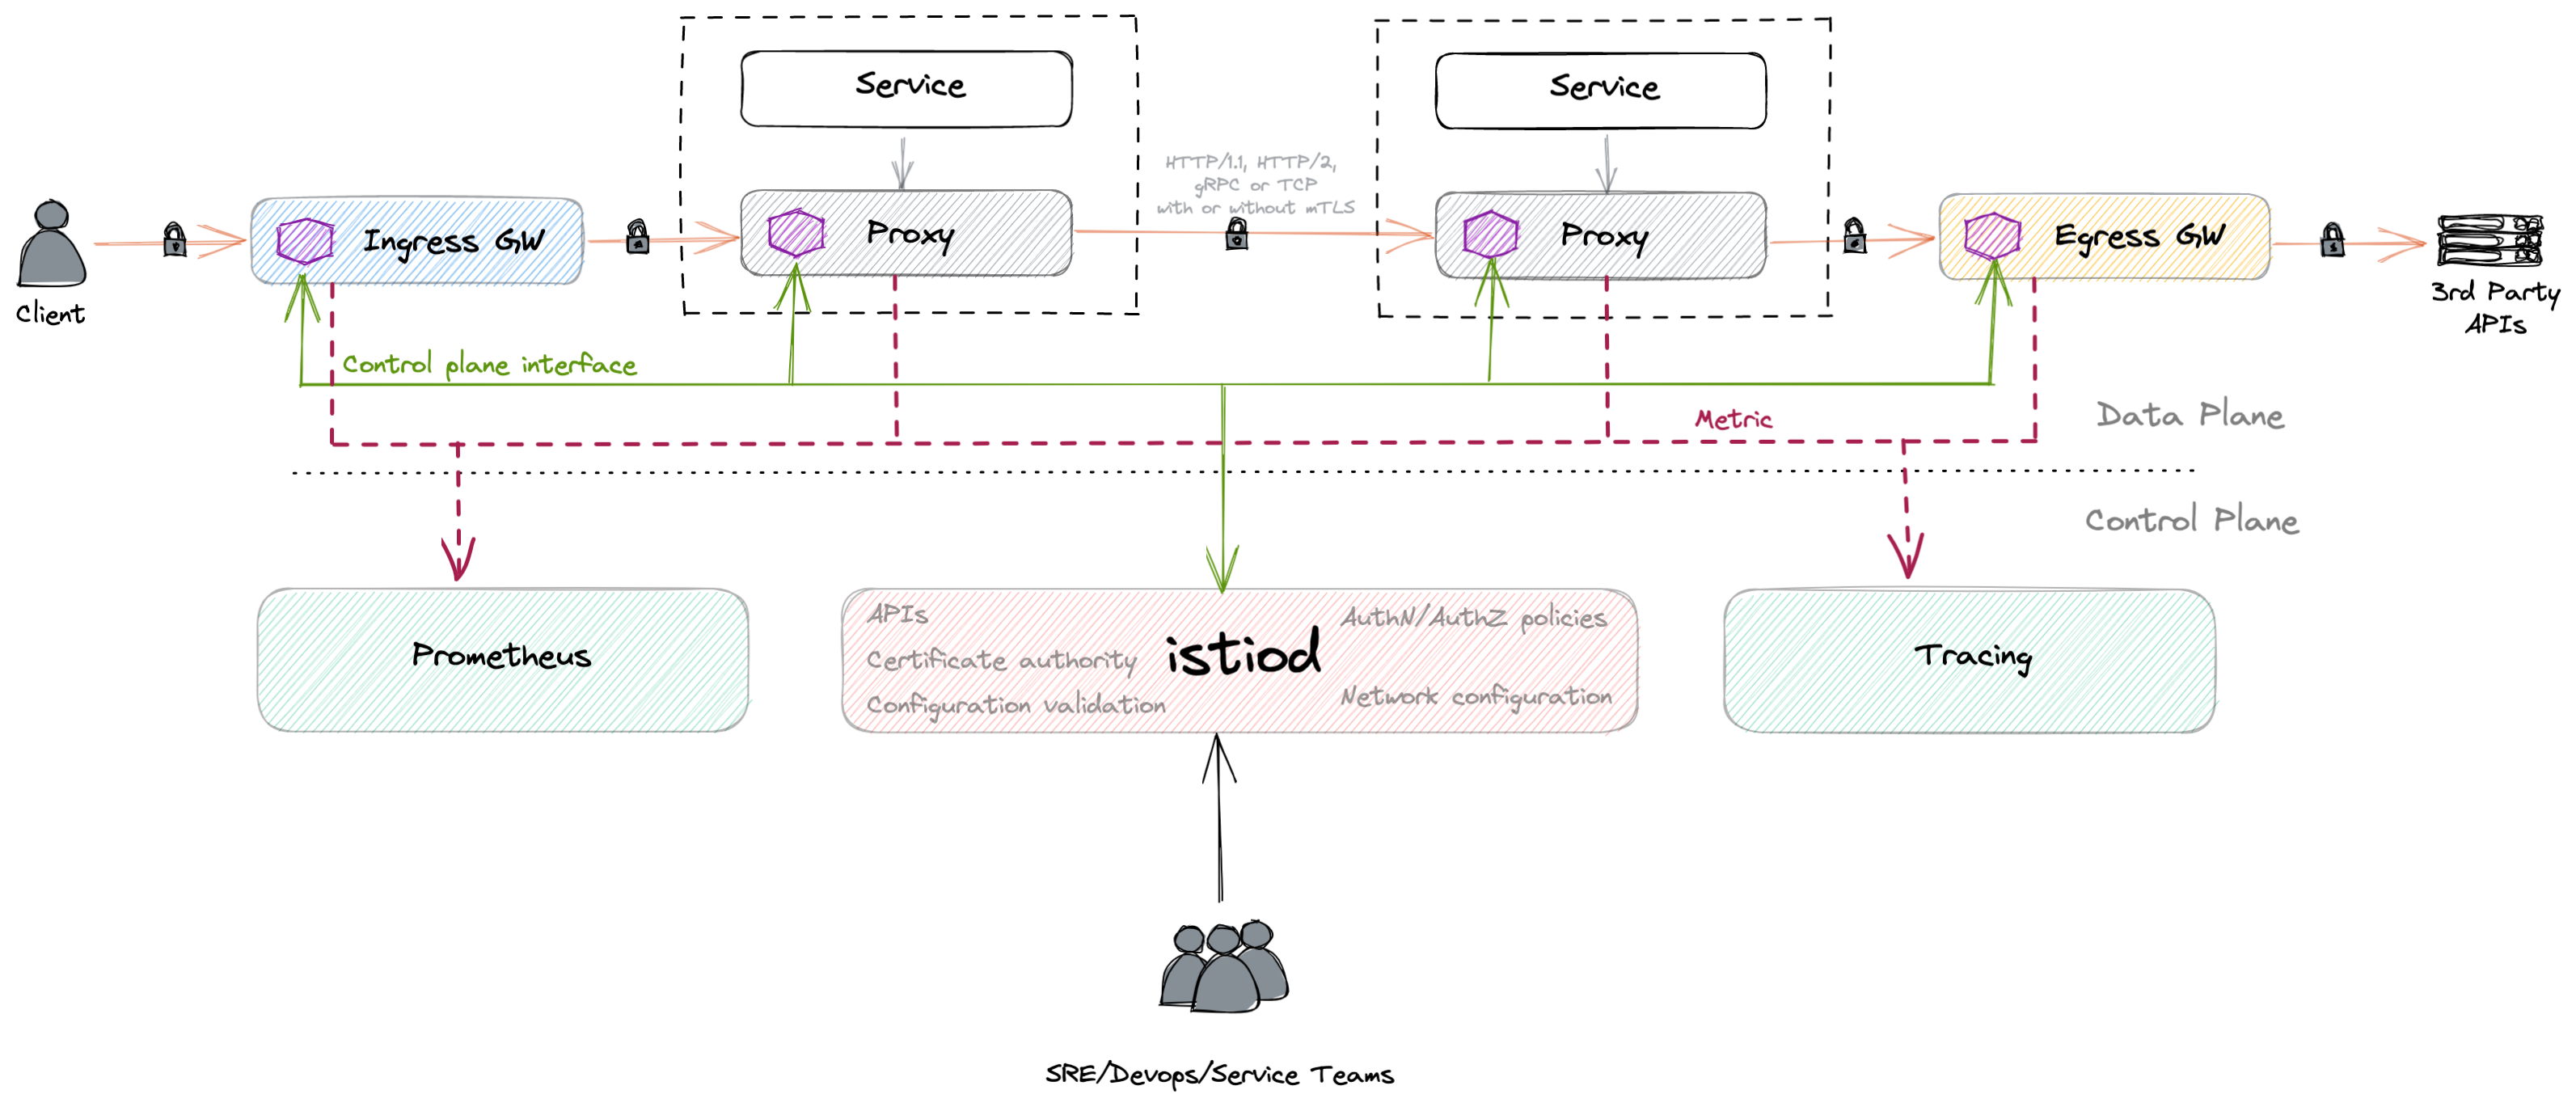
Istio로 서비스 메쉬를 구성하면, 클러스터 바깥으로 나가는 트래픽 흐름도 모니터링 할 수 있다!! 그 과정에서 사용하는게 egress-gateway 컴포넌트와 istio의 ServiceEntry 리소스다!
일단 데모부터 해보죠!!
이번 예제는 Istio 공식 문서의 “Egress Gateway” 문서를 바탕으로 실험해보았다.
그러나 몇몇 리소스의 yaml 정의는 이해가 쉽도록 변형을 가했다.
egress-gateway 컴포넌트 띄우기
istioctl에서 "default" Profile로 istio를 설치했다면, egress-gateway 컴포넌트가 없는 상태일 것이다. 그래서 아래 명령어로 직접 egress-gateway 컴포넌트를 띄워줘야 한다. "demo" Profile로 설치 했다면, egress-gateway는 이미 있을 것이다!
$ istioctl install \
    --set "spec.components.egressGateways[0].name=istio-egressgateway" \
    --set "spec.components.egressGateways[0].enabled=true"
테스트 용 Pod을 띄우자.
$ kubectl apply -f https://raw.githubusercontent.com/istio/istio/release-1.20/samples/sleep/sleep.yaml
위의 커맨드를 실행하면, 잠만 자는 잠만보 Pod이 하나 뜬다. 요 Pod에 접속해서 요청들을 보낼 것이다.
아래 커맨드로 Pod에 접속하고 무한 curl 요청을 보내보자.
$ kubectl exec -it deploy/sleep -- sh
~ $ while true; do curl -s -o /dev/null -w "%{http_code}\n" https://edition.cnn.com/politics; done
이렇게 할 경우, http status 코드만 받을 수 있다!!
이때는 Kiali에서 확인해봐도, 어떤 트래픽 흐름도 보이지 않는다.
ServiceEntry로 나가는 트래픽 모니터링하기
아래 명령어로 우리가 요청을 보내는 edition.cnn.com으로 가는 트래픽들을 모니터링 할 수 있게 해보자.
$ kubectl apply -f - <<EOF
apiVersion: networking.istio.io/v1alpha3
kind: ServiceEntry
metadata:
  name: cnn
spec:
  hosts:
  - edition.cnn.com
  ports:
  - number: 443
    name: tls
    protocol: TLS
  resolution: DNS
EOF
그러고 curl로 무한 요청을 보내면…
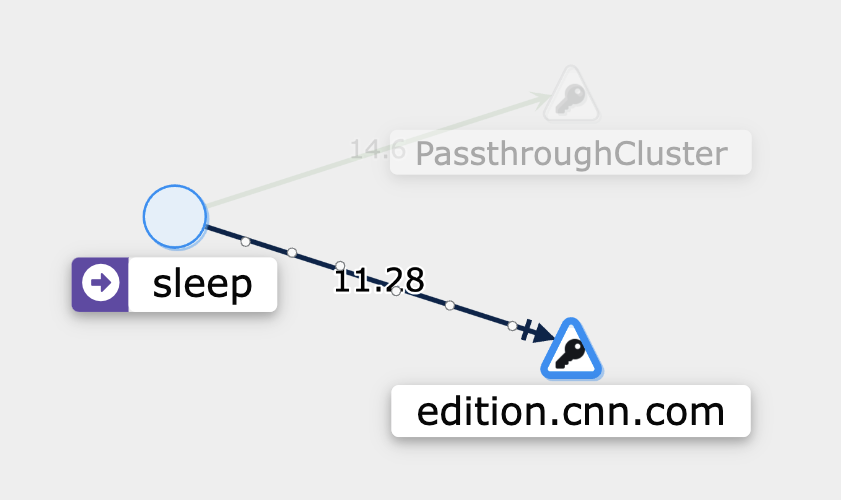
와우!! 이제는 edition.cnn.com 사이트로 가는 트래픽을 모니터링 할 수 있게 되었다!!
해당 사이트에 초당 몇번 쿼리하는지도 알 수 있는건 덤!!
참고로 PassthroughCluster는 kubectl exec나 port-forward 접속 했을 때 저렇게 뜬다.
Egress Gateway를 통해 트래픽이 나가도록 설정
단순히 ServiceEntry 리소스를 만들어서 운영해도 충분 할 수도 있지만, egress-gateway 리소스를 사용해서, 클러스터 바깥으로 나가는 출구(exit point)를 지정할 수도 있다.
또, 외부로 나가는 트래픽에 대해서도 DestinationRule을 적용할 수 있다!!
이를 위해 Gateway, VirtualService 리소스를 추가로 만들어 주자. (DestinationRule 적용은 좀 있다가 해볼거다!)
$ kubectl apply -f - <<EOF
apiVersion: networking.istio.io/v1alpha3
kind: Gateway
metadata:
  name: istio-egressgateway
spec:
  selector:
    istio: egressgateway
  servers:
  - port:
      number: 443 # egress gateway의 포트
      name: tls
      protocol: TLS
    hosts:
    - edition.cnn.com
    tls:
      mode: PASSTHROUGH
EOF
* “TLS Pass-through”에 대해선 Istio TLS Network 관련 사전 지식 문서에 따로 정리 했으니 참고하자. 여기서는 Egress GW를 통해 서비스 메시 바깥으로 나가는 트래픽을 따로 TLS 복호화 없이 그대로 통과 시킨다는 의미로 받아들이자.
이제 2개의 VirtrualService 리소스를 만들어 주는데
첫번째 것은 Service Mesh에서 edition.cnn.com으로 보내는 트래픽을 Egress GW로 보내도록 설정 하고
$ kubectl apply -f - <<EOF
apiVersion: networking.istio.io/v1alpha3
kind: VirtualService
metadata:
  name: mesh-to-egress-gateway
spec:
  hosts:
  - edition.cnn.com
  gateways:
  - mesh
  tls:
  - match:
    - port: 443
      sniHosts:
      - edition.cnn.com
    route:
    - destination:
        host: istio-egressgateway.istio-system.svc.cluster.local
        port:
          number: 443
EOF
두번째 것은 Egress GW가 Forward 하는 트래픽이 어디로 갈지를 설정한다.
$ kubectl apply -f - <<EOF
apiVersion: networking.istio.io/v1alpha3
kind: VirtualService
metadata:
  name: egressgateway-to-external
spec:
  hosts:
  - edition.cnn.com
  gateways:
  - istio-egressgateway
  tls:
  - match:
    - port: 443
      sniHosts:
      - edition.cnn.com
    route:
    - destination:
        host: edition.cnn.com
        port:
          number: 443
EOF
그리고 요청을 보내면…
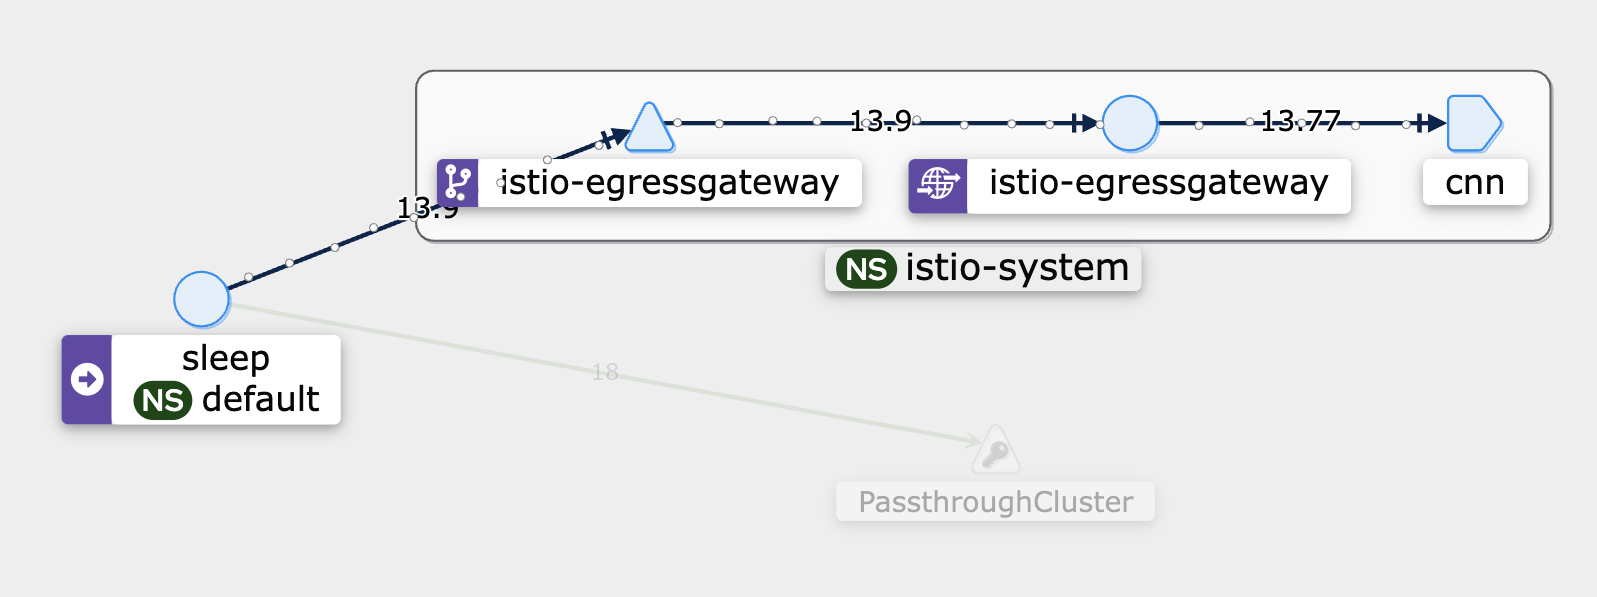
이렇게 트래픽이 Egress GW를 통해서 나가게 된다!!
외부 host에도 DestinationRule 적용하기
실습에서 쓰고 있는 edition.cnn.com은 Service Mesh 내부의 것이 아니기 때문에 원래 DestinationRule을 적용할 수 없다.
그러나 우리는 edition.cnn.com으로 나가는 트래픽을 Egress GW의 Envoy Proxy를 거쳐서 가고 있기 때문에 DestinationRule을 Egress GW에 걸어준다면, edition.cnn.com으로 나가는 트래팩에도 DR 규칙들을 적용할 수 있다.
일단 바로 Egress GW에 적용된 DestinationRule부터 살펴보자!!
$ kubectl apply -f - <<EOF
apiVersion: networking.istio.io/v1alpha3
kind: DestinationRule
metadata:
  name: egressgateway-for-cnn
spec:
  host: istio-egressgateway.istio-system.svc.cluster.local
  trafficPolicy:
    connectionPool:
      tcp:
        maxConnections: 1
EOF
이렇게 하면, Egress GW로 들어오는 트래픽에 DestinationRule이 적용된다. 그리고 둘 이상의 터미널에서 Egress GW로 요청을 보내게 되면 maxConnections에 정의한 숫자 만큼의 Connection만 유지되고 나머지는 Drop 된다!!!
즉, 외부로 나가는 트래픽도 제어할 수 있게 된거다!!
Out-bound 트래픽에 대한 정책 설정하기
https://istio.io/latest/docs/tasks/traffic-management/egress/egress-control/#envoy-passthrough-to-external-services
istio가 적용된 pod들의 모든 in/out 트래픽은 해당 Pod의 envoy sidecar를 통해 제어된다. istio는 unknown host/service로 향하는 트래픽의 경우, 그냥 흘려보내는(Passthrough)게 기본 동작이다. 그러나 때에 따라서는(예를 들어 강한 네트워크 보안 조건이 필요하다면) 이런 unknown 목적지로 가는 트래픽을 제어해야 할 때가 있다.
Istio에서는 밖으로 나가는 트래픽에 3가지 정책을 세울 수 있다.
- mesh 내에 정의되지 않은 목적지로 가는 트래픽을 모두 허용하기
ServiceEntry를 구성한 외부 목적지만 허용하기- 특정 IP 대역으로 가는 외부 트래픽만 허용하기
isito 클러스터의 트래픽 제어 옵션
istio 클러스터를 구성할 때, IstioOperator의 meshConfig.outboundTrafficPolicy.mode 옵션을 조정해서 외부로 나가는 트래픽을 전면 허용할지, 등록한 것만 허용할지 정할 수 있다.
ALLOW_ANY(default)REGISTRY_ONLY
ALLOW_ANY는 전면 허용이므로 이미 알 것이고, 아래 커맨드로 REGISTRY_ONLY로 옵션을 바꾼 후, 실험해보자.
$ istioctl install \
  --set "spec.components.egressGateways[0].name=istio-egressgateway" \
  --set "spec.components.egressGateways[0].enabled=true" \
  --set meshConfig.outboundTrafficPolicy.mode=REGISTRY_ONLY
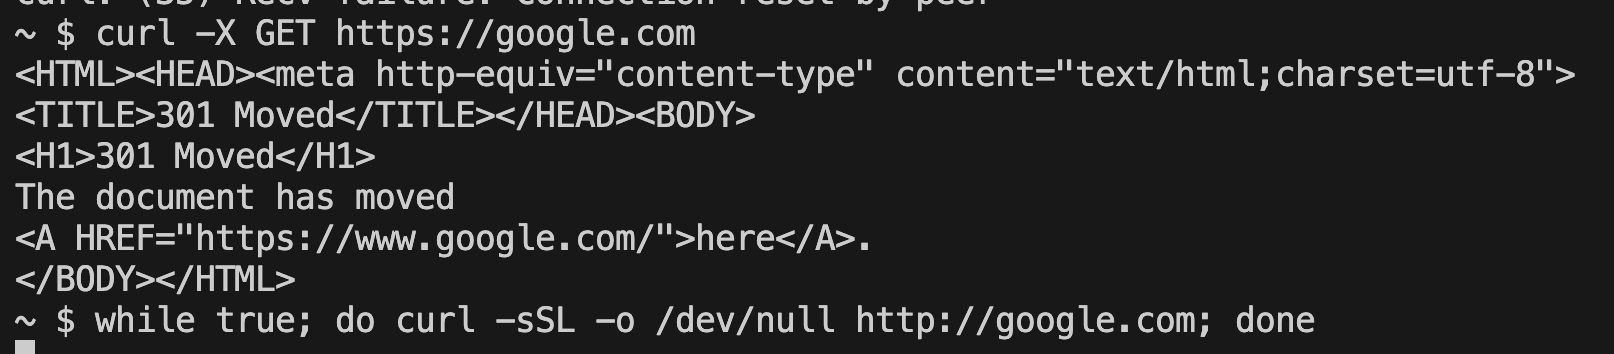
앞에서 edition.cnn.com 주소에 대해서는 실험을 해봤으니, 이번에는 google.com을 등록하지 않은 상태에서 ping을 날려보자.
$ kubectl exec -it deploy/sleep -- sh
~ $ while true; do curl -s -o /dev/null https://google.com; done
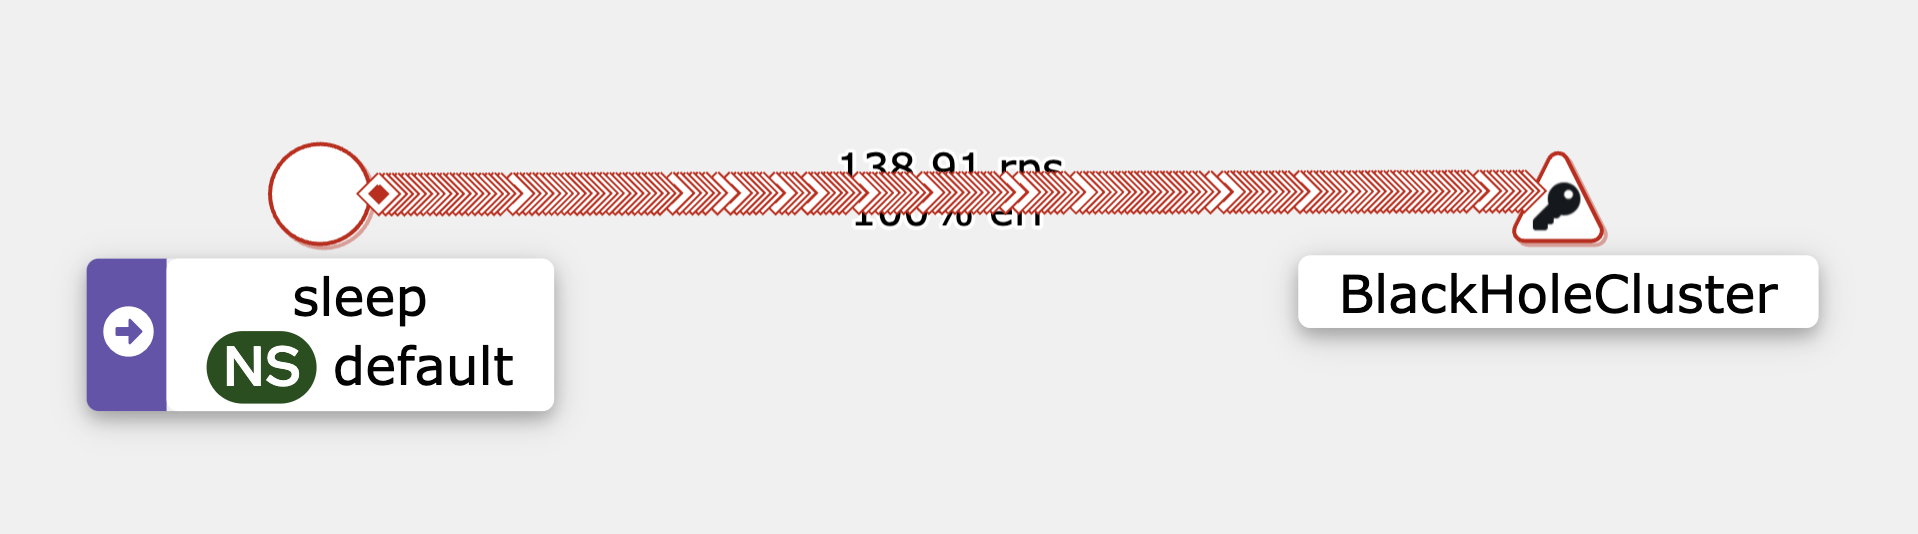
Kiali로 확인하보면, BlackHoleCluster라는 이상한 곳으로 트래픽이 모아져버린다!
아래와 같이 단일 요청을 보내면, Connection reset by peer라는 이상한 에러도 뱉는다.

이런 현상은 google.com을 등록해주지 않아서 그런 거라서, 아래와 같이 ServiceEntry로 등록하고 나면, 더이상 해당 에러는 뜨지 않는다!!
$ kubectl apply -f - <<EOF
apiVersion: networking.istio.io/v1alpha3
kind: ServiceEntry
metadata:
  name: google
spec:
  hosts:
  - google.com
  ports:
  - number: 443
    name: tls
    protocol: TLS
  resolution: DNS
EOF
암튼 등록된 외부 호스트로만 트래픽을 흘려야 한다면, REGISTRY_ONLY 옵션으로 설정하자!!
맺음말

하아… 정말 ServiceEntry의 컨셉 자체는 외부 트래픽을 Istio로 모니터링 한다는 건데, Egress Gateway를 같이 쓰기 시작하면서 이해 하는게 정말 어려워 졌다. 분명 나는 Udemy 강좌를 다 듣고, 다시 공부하고 있는 건데…
덕분에 VS, DR, Gateway까지 다시 꼼꼼히 공부했고, 이제는 이 셋이 어떤 역할을 하는 건지 이해 하기 시작 했다!!
이젠 Istio 공식 블로그 포스트들 좀 읽어보고, 문서 좀 꼼꼼히 읽어보면서 시험 준비를 계속 할 것 같다. 시험까지 이제 D-16… 화이팅…! 🥊