
Istio의 Authentication & Authorization

istio를 사용하면 Authentication과 Authorization을 Envoy Proxy 레벨에서 수행할 수 있다. 이건 AuthN & AuthZ 로직을 어플리케이션에서 구현이 없어도 워크로드를 보호할 수 있도록 하는 기능 같다!!
사전 준비: helloworld 예제
Istio 예제로 제공되는 helloworld 예제를 활용해서 Istio의 AuthN&AuthZ을 검증해보자. 자세한 예제는 이전에 적어둔 Istio ‘helloworld’ 데모 포스트에서 확인할 수 있다.
일단 위의 명령어로 워크로드를 띄우고
$ kubectl apply \
    -n default \
    -f https://raw.githubusercontent.com/istio/istio/1.20.2/samples/helloworld/helloworld.yaml
워크로드를 띄운 후에 다른 Pod에 접속해서 아래와 같이 요청을 보내면, 아래와 같이 응답을 받을 수 있다!
~ $ curl -X GET http://helloworld.default.svc.cluster.local:5000/hello
Hello version: v2, instance: helloworld-v2-xxxx-xxxx
Auth를 구축해보자!
Authentication
Istio의 RequestAuthentication는 요청의 Bearer 토큰에 담긴 JWT 데이터를 검증하고 디코드 하는 역할을 한다. 아래와 명령어로 RequestAuthentication 리소스를 디플로이하자.
$ kubectl apply -f - <<EOF
apiVersion: security.istio.io/v1beta1
kind: RequestAuthentication
metadata:
 name: helloworld-authentication
 namespace: default
spec:
  selector:
    matchLabels:
      app: helloworld
  jwtRules:
  - issuer: "testing@secure.istio.io"
    jwksUri: "https://raw.githubusercontent.com/istio/istio/master/security/tools/jwt/samples/jwks.json"
EOF
Authorization
AuthorizationPolicy는 RequestAuthentication이 검증하고 디코딩한 JWT 값을 이용해 인가(Authorization)을 수행하는 리소스다. 요것도 아래 리소스를 통해 디플로이 하자.
$ kubectl apply -f - <<EOF
apiVersion: security.istio.io/v1beta1
kind: AuthorizationPolicy
metadata:
  name: helloworld-require-jwt
  namespace: default
spec:
  selector:
    matchLabels:
      app: helloworld
  action: ALLOW
  rules:
  - from:
    - source:
       # format: issuer/subject
       requestPrincipals: ["testing@secure.istio.io/testing@secure.istio.io"]
EOF
이때 “issuer”는 토큰을 발급한 주체(인증서버), “subject”는 토큰을 발급받은 주체(사용자, 서비스계정)을 표현한다.
JWT 실어서 요청 보내기
RequestAuthentication과 AuthorizationPolicy 리소스를 추가하고 난 뒤에 요청을 보내면, 아래와 같이 요청이 거부 된다.
~ $ curl -X GET http://helloworld.default.svc.cluster.local:5000/hello
RBAC: access denied
이제 헤더에 Bearer 토큰을 실어서 보내야 하는데, 잘못된 토큰을 담아도 이렇게 거부 당한다.
~ $ curl -X GET http://helloworld.default.svc.cluster.local:5000/hello \
    --header "Authorization: Bearer helloworld"
Jwt is not in the form of Header.Payload.Signature with two dots and 3 sections
올바른 토큰 값을 사용해야 하는데, 그 값은 istio 예제에서 받아올 수 있다.
$ export TOKEN=$(curl -k https://raw.githubusercontent.com/istio/istio/master/security/tools/jwt/samples/demo.jwt -s)
$ echo $TOKEN
jwt.io 사이트에서 디코딩 해보면, issuer와 subscriber 등에 대한 정보가 담겨 있다.
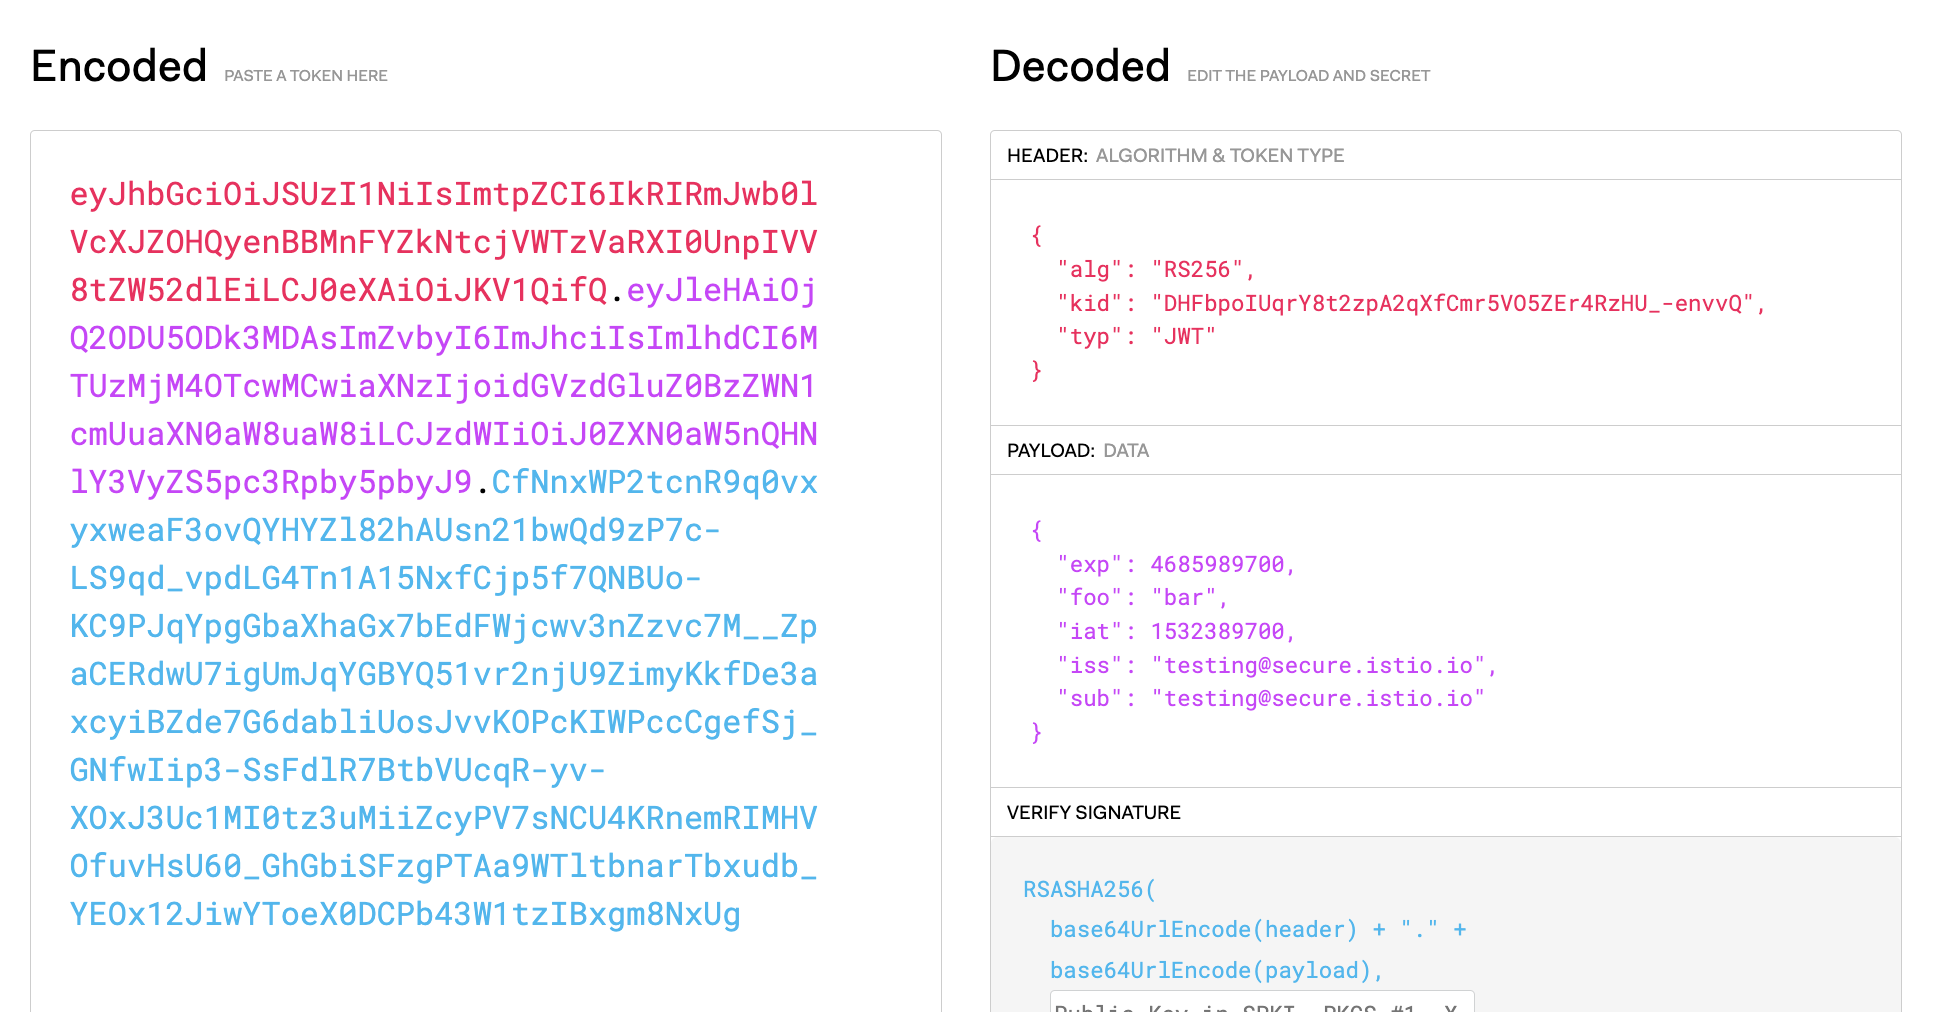 https://jwt.io/
이제 이 토큰을 사용해서 응답을 보내면…
~ $ curl -X GET http://helloworld.default.svc.cluster.local:5000/hello \
      --header "Authorization: Bearer ${TOKEN}"
# 응답을 제대로 받았다!
성공!!
더 살펴보기
RequestAuthentication은 JWT 토큰이 없을 땐 통과시킨다
A request that does not contain any authentication credentials will be accepted but will not have any authenticated identity - istio: RequestAuthentication
RequestAuthentication만 설정 했을 때는 JWT 없이 요청을 보내면 응답이 돌아온다!!! 그래서 처음에 RequestAuthentication가 뭘 하는지 이해하기가 조금 어려웠던 것 같다. JWT 토큰이 없으면 요청을 거부하게 만드려면 반드시 AuthorizationPolicy까지 설정해야 한다고 한다.
그런데, RequestAuthentication은 올바르지 않은 JWT 토큰, 명시하지 않은 issuer가 발급한 JWT 토큰은 거부 한다!
# Invalid JWT 토큰으로 요청을 보냄
~ $ curl -X GET http://helloworld.default.svc.cluster.local:5000/hello \
      --header "Authorization: Bearer helloworld"
Jwt is not in the form of Header.Payload.Signature with two dots and 3 sections
제공되는 JWT 토큰을 그대로 쓰기 위해서 RequestAuthentication에 명시한 issuer를 잠시 다른 것으로 변경하고, curl 요청을 보내겠다.
$ kubectl apply -f - <<EOF
apiVersion: security.istio.io/v1beta1
kind: RequestAuthentication
metadata:
 name: helloworld-authentication
 namespace: default
spec:
  selector:
    matchLabels:
      app: helloworld
  jwtRules:
  - issuer: "new-issuer@secure.istio.io"
    jwksUri: "https://raw.githubusercontent.com/istio/istio/master/security/tools/jwt/samples/jwks.json"
EOF
이젠 testing@secure.istio.io에서 발급한 JWT 토큰은 유요하지 않은 issuer가 발급한 토큰이 되었다. curl 요청을 다시 보내보자.
# 명시하지 않은 issuer가 발급한 JWT 토큰으로 요청을 보냄.
~ $ export TOKEN=$(curl -k https://raw.githubusercontent.com/istio/istio/master/security/tools/jwt/samples/demo.jwt -s)
~ $ curl -X GET http://helloworld.default.svc.cluster.local:5000/hello \
      --header "Authorization: Bearer ${TOKEN}"
Jwt issuer is not configured
즉, JWT 토큰이 있다면 RequestAuthentication 리소스에 명시한 issuer와 JWT 디코딩 조건을 평가하고 이에 따라 요청을 허용하거나 거부한다!
만약 JWT 토큰이 없을 때 요청을 “거부”하고 싶다면, 이건 AuthorizationPolicy 리소스에서 핸들링 해줘야 한다!
apiVersion: security.istio.io/v1beta1
kind: AuthorizationPolicy
...
  action: ALLOW
  rules:
  - from:
    - source:
       requestPrincipals: ["testing@secure.istio.io/testing@secure.istio.io"]
위와 같이 requestPrincipals에 어떤 값을 정의하기만 하면, JWT 토큰이 없는 경우가 거부 된다.
Ingress Gateway로 트래픽을 받고 있다면
이번에는 트래픽을 Ingress Gateway을 통해 받는 경우를 생각해보자! 이 경우에 RequestAuthentication과 AuthorizationPolicy에 어떤 변화가 있을까?
일단, Gateway와 VirtualService 리소스를 정의하자.
$ kubectl apply -f - <<EOF
apiVersion: networking.istio.io/v1alpha3
kind: Gateway
metadata:
  name: helloworld-gateway
spec:
  selector:
    istio: ingressgateway
  servers:
  - port:
      number: 8080
      name: http
      protocol: HTTP
    hosts:
    - "*"
---
apiVersion: networking.istio.io/v1alpha3
kind: VirtualService
metadata:
  name: helloworld-vs
spec:
  hosts:
  - "*"
  gateways:
  - helloworld-gateway
  http:
  - match:
    - uri:
        exact: /hello
    route:
    - destination:
        port:
          number: 5000
        host: helloworld.default.svc.cluster.local
EOF
그리고 Ingress Gateway와 연결된 External IP에 아래 명령어로 JWT 토큰을 실어서 curl 요청을 보내보자. 아! 진행하기 전에 바로 직전 섹션에서 RequestAuthentication 리소스의 issuer를 수정 했다면, 다시 원래대로 testing@security.istio.io로 롤백 해두자.
~ $ export TOKEN=$(curl -k https://raw.githubusercontent.com/istio/istio/master/security/tools/jwt/samples/demo.jwt -s)
~ $ curl -X GET http://192.168.64.2/hello
RBAC: access denied
~ $ curl -X GET http://192.168.64.2/hello --header "Authorization: Bearer ${TOKEN}"
Hello version: v2, instance: helloworld-v2-7bd9f44595-bhbpd
요청을 직접 워크로드에 보냈던 것 처럼 JWT 헤더를 포함해서 요청을 해야 요청이 처리되는 모습을 볼 수 있다.
그 이유는 우리가 보낸 요청을 받아서 라우팅 하는 Ingress Gateway의 Envoy Proxy가 트래픽을 Helloworld 워크로드로 포워딩 할 때, 헤더(header)를 보존하기 때문이다!!
워크로드와 envoy sidecar가 같이 있을 때도 envoy는 들어오는 트래픽을 워크로드 컨테이너로 그대로 포워딩 했다. 마찬가지로 Ingress Gateway의 envoy도 VirtualService 규칙에 정의된 목적지로 들어오는 트래픽을 헤더를 포함해 그대로 포워딩 하는 것으로 보인다.
forwardOriginalToken 속성
만약 Envoy로 들어오는 JWT 토큰이 Envoy 단에서 검증된(validated) 후에 본래의 워크로드 컨테이너로 까지 포워딩 되길 원한다면, RequestAuthentication 리소스에 forwardOriginalToken 속성을 true로 설정해줘야 한다.
apiVersion: security.istio.io/v1beta1
kind: RequestAuthentication
...
  jwtRules:
  - issuer: "testing@secure.istio.io"
    jwksUri: "..."
    forwardOriginalToken: true
본래 JWT 인증-인가가 없던 워크로드 였는데, Istio를 통해 Auth 레이어를 구현한 것이니 forwardOriginalToken의 기본값은 false로 설정되어 원본 워크로드에 JWT 토큰을 포워딩 하지 않는 것 같다.
oauth2-proxy랑 비슷한 것 같음

Auth 없이 구축된 워크로드에 Auth 레이어를 붙여준다는게, oauth2-proxy랑 비슷한 것 같다. 요것도 Auth를 위임 받아 인증된 트래픽만 해당 워크로드에 접근하도록 세팅하는데 사용하기 때문!!
참고자료
- Istio By Example: JWT
- [Github] GCP istio Security Example
- 예제를 보면, 무슨 GCP 클라우트에 워크로드를 올리라는데, 해당 부분은 무시하고 나머지 부분만 잘 따라해보자.
- [Github] istio JWT Security Tools
- 만약 예제에서 사용하는 JWT 토큰의
issuer를 변경하거나 property를 추가/수정/삭제 하고 싶다면 위 링크에 있는gen-jwt.py파일로 커스텀 할 수 있다!
- 만약 예제에서 사용하는 JWT 토큰의